
I’ve been exploring a lot of tools lately and I think I’ve found a great balance between simplicity, efficiency, and lower token consumption. With that in mind, I split the tools into two aspects: infrastructure and workflow, and throughout this post I’ll explain each one and how to integrate them into your environment.
Infrastructure
Workflow
Pi agent
Imagine Claude Code, but without hardcoded MCP, without sub-agents, without plan mode, without all the context that Claude injects and modifies in your prompt with every release, and on top of that super simple and highly customizable (skills, prompt, themes, extensions). As a result: fewer unnecessary features, fewer bugs, and a more stable tool.
According to the author, when you start a session, Claude Code injects ~10,000 tokens as harness.
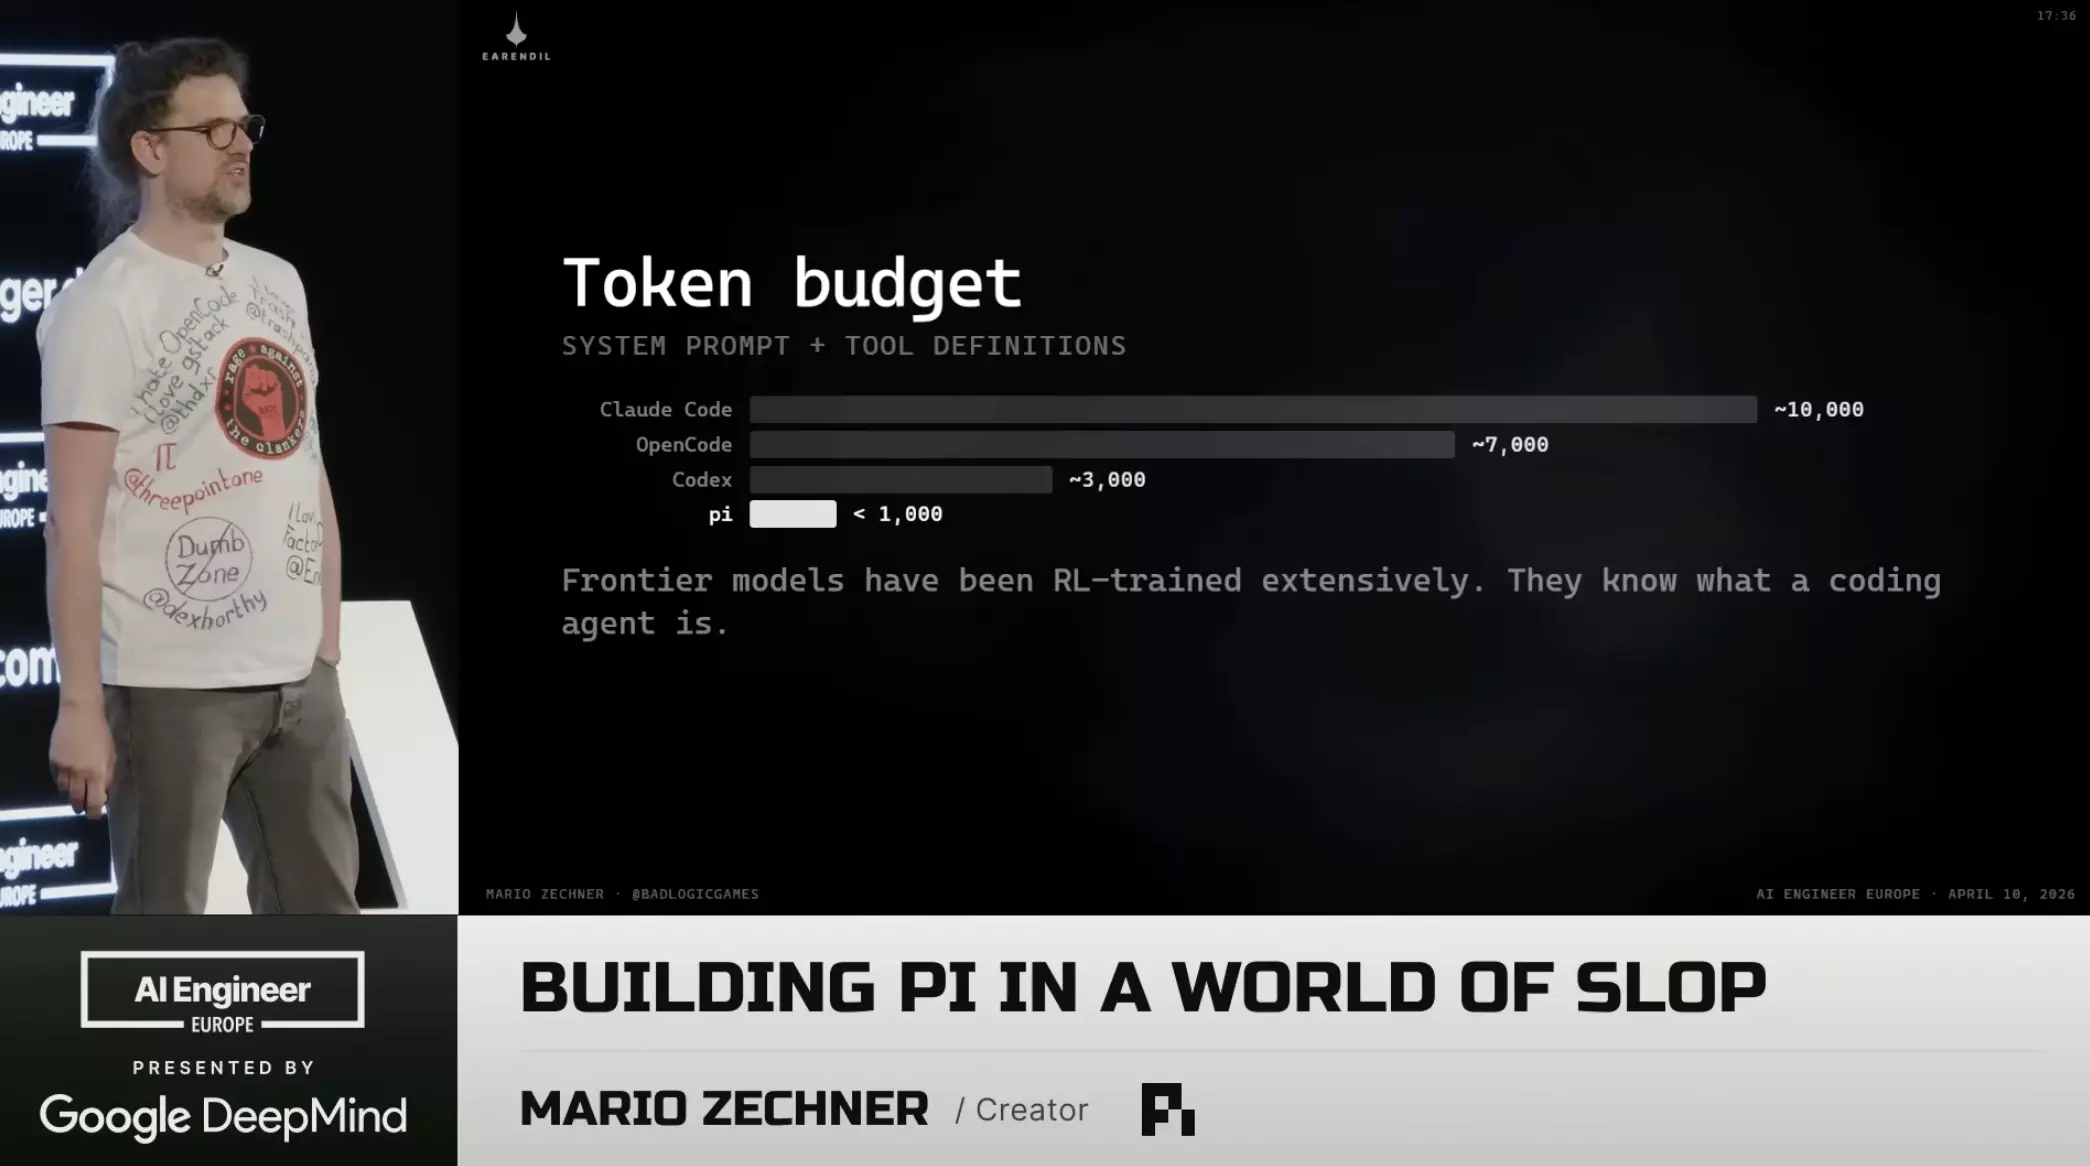
Comparison of tokens injected per session: Pi vs Claude Code
With Pi I have greater control over the context I want to work in and less interference from the tool. I believe the tool should adapt to my workflow, not the other way around.
rtk
It works as an intermediary between bash and the HTTP request: it filters out everything that isn’t useful from frequently used commands like ls, cat, and grep, and then compresses them, resulting in an average reduction of ~80% in tokens.
It’s simple to integrate into your workflow, just install its binary with brew install rtk.
Running rtk gain, you can see how much is being saved per command, as shown below.
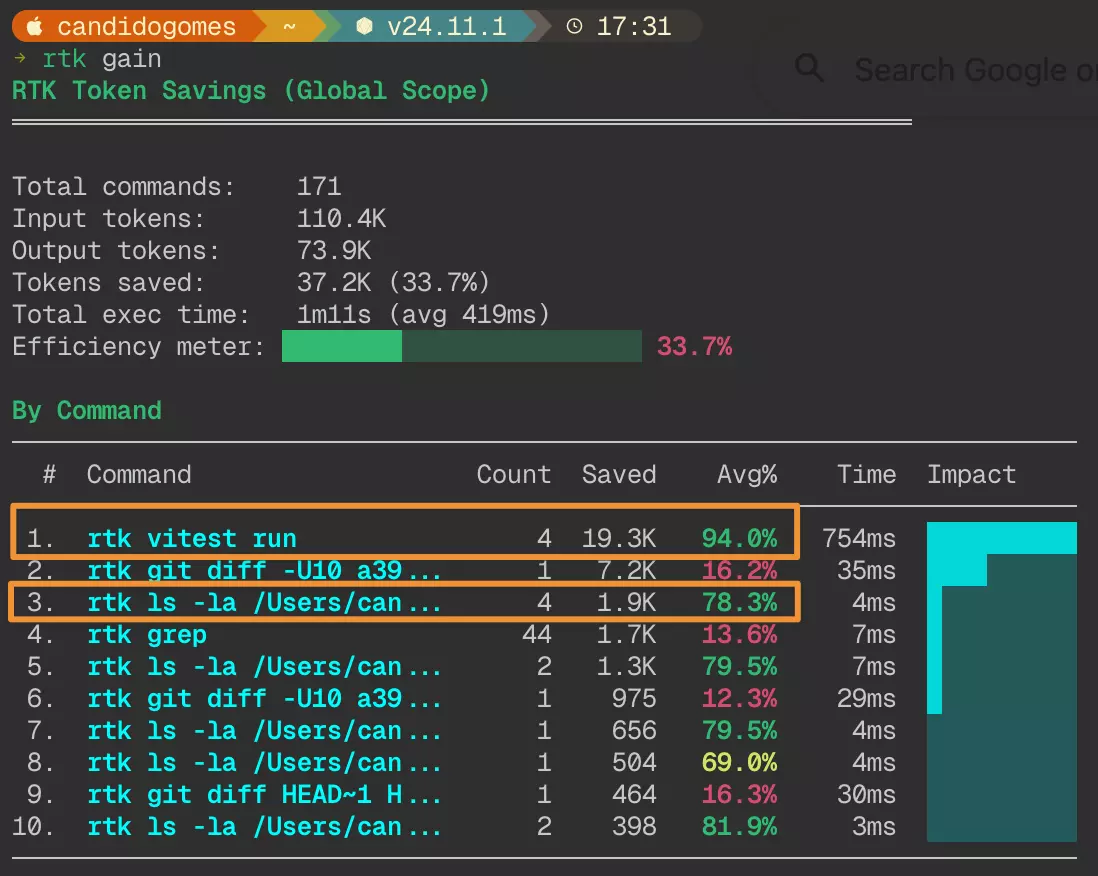
Output of rtk gain showing token savings per command
context-mode
It’s an MCP server that sits between your agent tool and your tools. Instead of resending the full conversation on every request, it stores the most repeated parts in a local database. Agents fetch them on demand, and only the summary re-enters the context, making it very useful for long sessions.
The plugin hooks into five points in the session lifecycle:
- PreToolUse: Route tool calls. Block curl/wget, redirect large output to sandbox.
- PostToolUse: Capture events. File ops, git, errors, decisions → SessionDB.
- SessionStart: Restore state. Inject resume snapshot, reload indexed knowledge.
- PreCompact: Preserve state. Build snapshot before context wipe.
- UserPromptSubmit: Capture intent. Track decisions, corrections, session mode.
With this optimization you can reach up to 30x fewer tokens for the same work and the same output.
Worth checking out and integrating into your workflow.
GitNexus
It analyzes your entire repository, creates a dependency graph, and stores that information in LadyBugDb (think of it as DuckDB, but for graph databases using columnar storage). It then exposes that information through an MCP server. This way, whenever the LLM needs to search, it doesn’t have to read all files, run regex or bash commands to find which dependencies are in a given file; it finds them easily via Graph query. This significantly reduces the number of tokens and increases search accuracy.
To initialize it in your project, you need to:
- Analyze the project and index the graph:
npx gitnexus analyze; - Start the MCP server:
npx gitnexus@latest serve; - Add
.mcp.jsonto the root of your project:
{ "mcpServers": { "gitnexus": { "command": "npx", "args": ["-y", "gitnexus@latest", "mcp"] } }}- Install the MCP adapter plugin in Pi so the integration works:
pi install npm:pi-mcp-adapter; - Start
pi. Below, I ran the same query in two scenarios: one using the Hugging Face integration with Kimi K2.6 and GitNexus MCP, and another using only Claude Code.
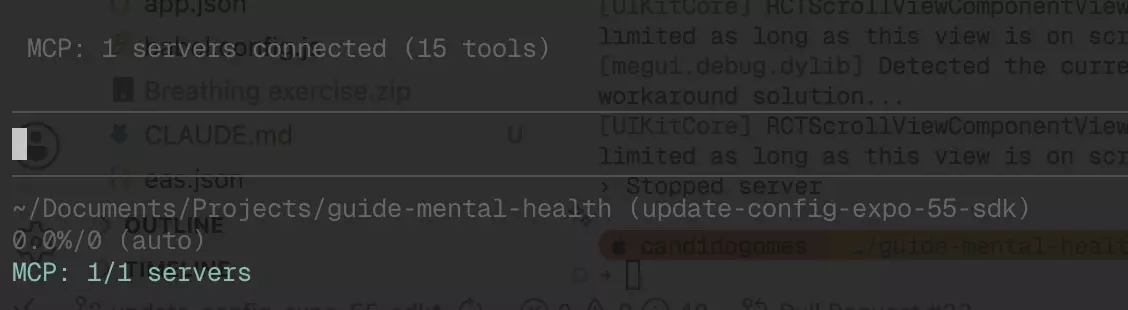
Pi with the GitNexus MCP connected
The prompt used was explain how diagnosis api works. In the image below, you can see that Pi already queries GitNexus before executing any bash command; it searches LadybugDb for all dependencies and finds all the relationships. It’s much more efficient.
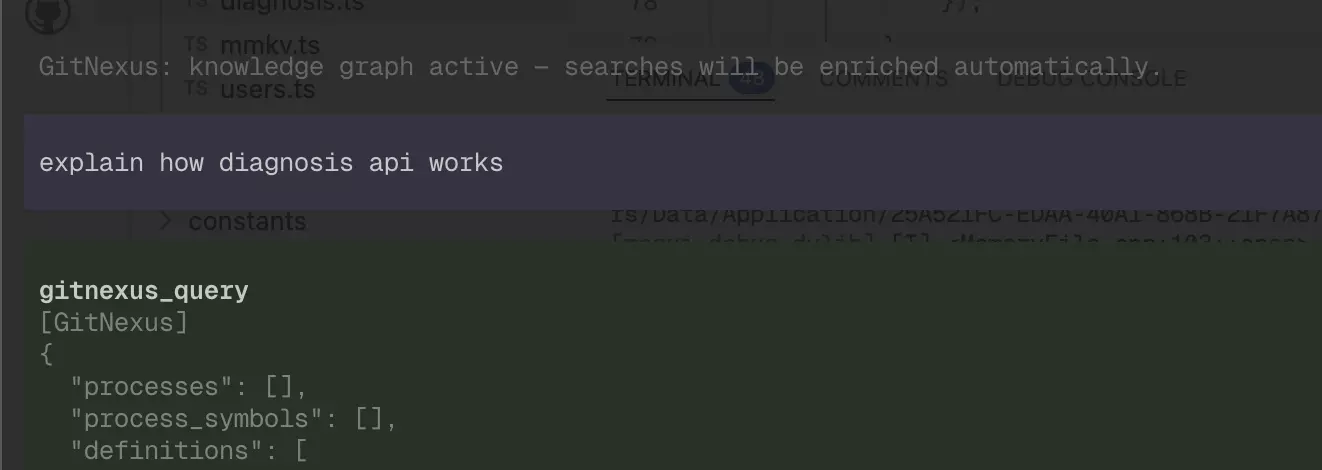
Pi querying GitNexus via Graph query before any bash command
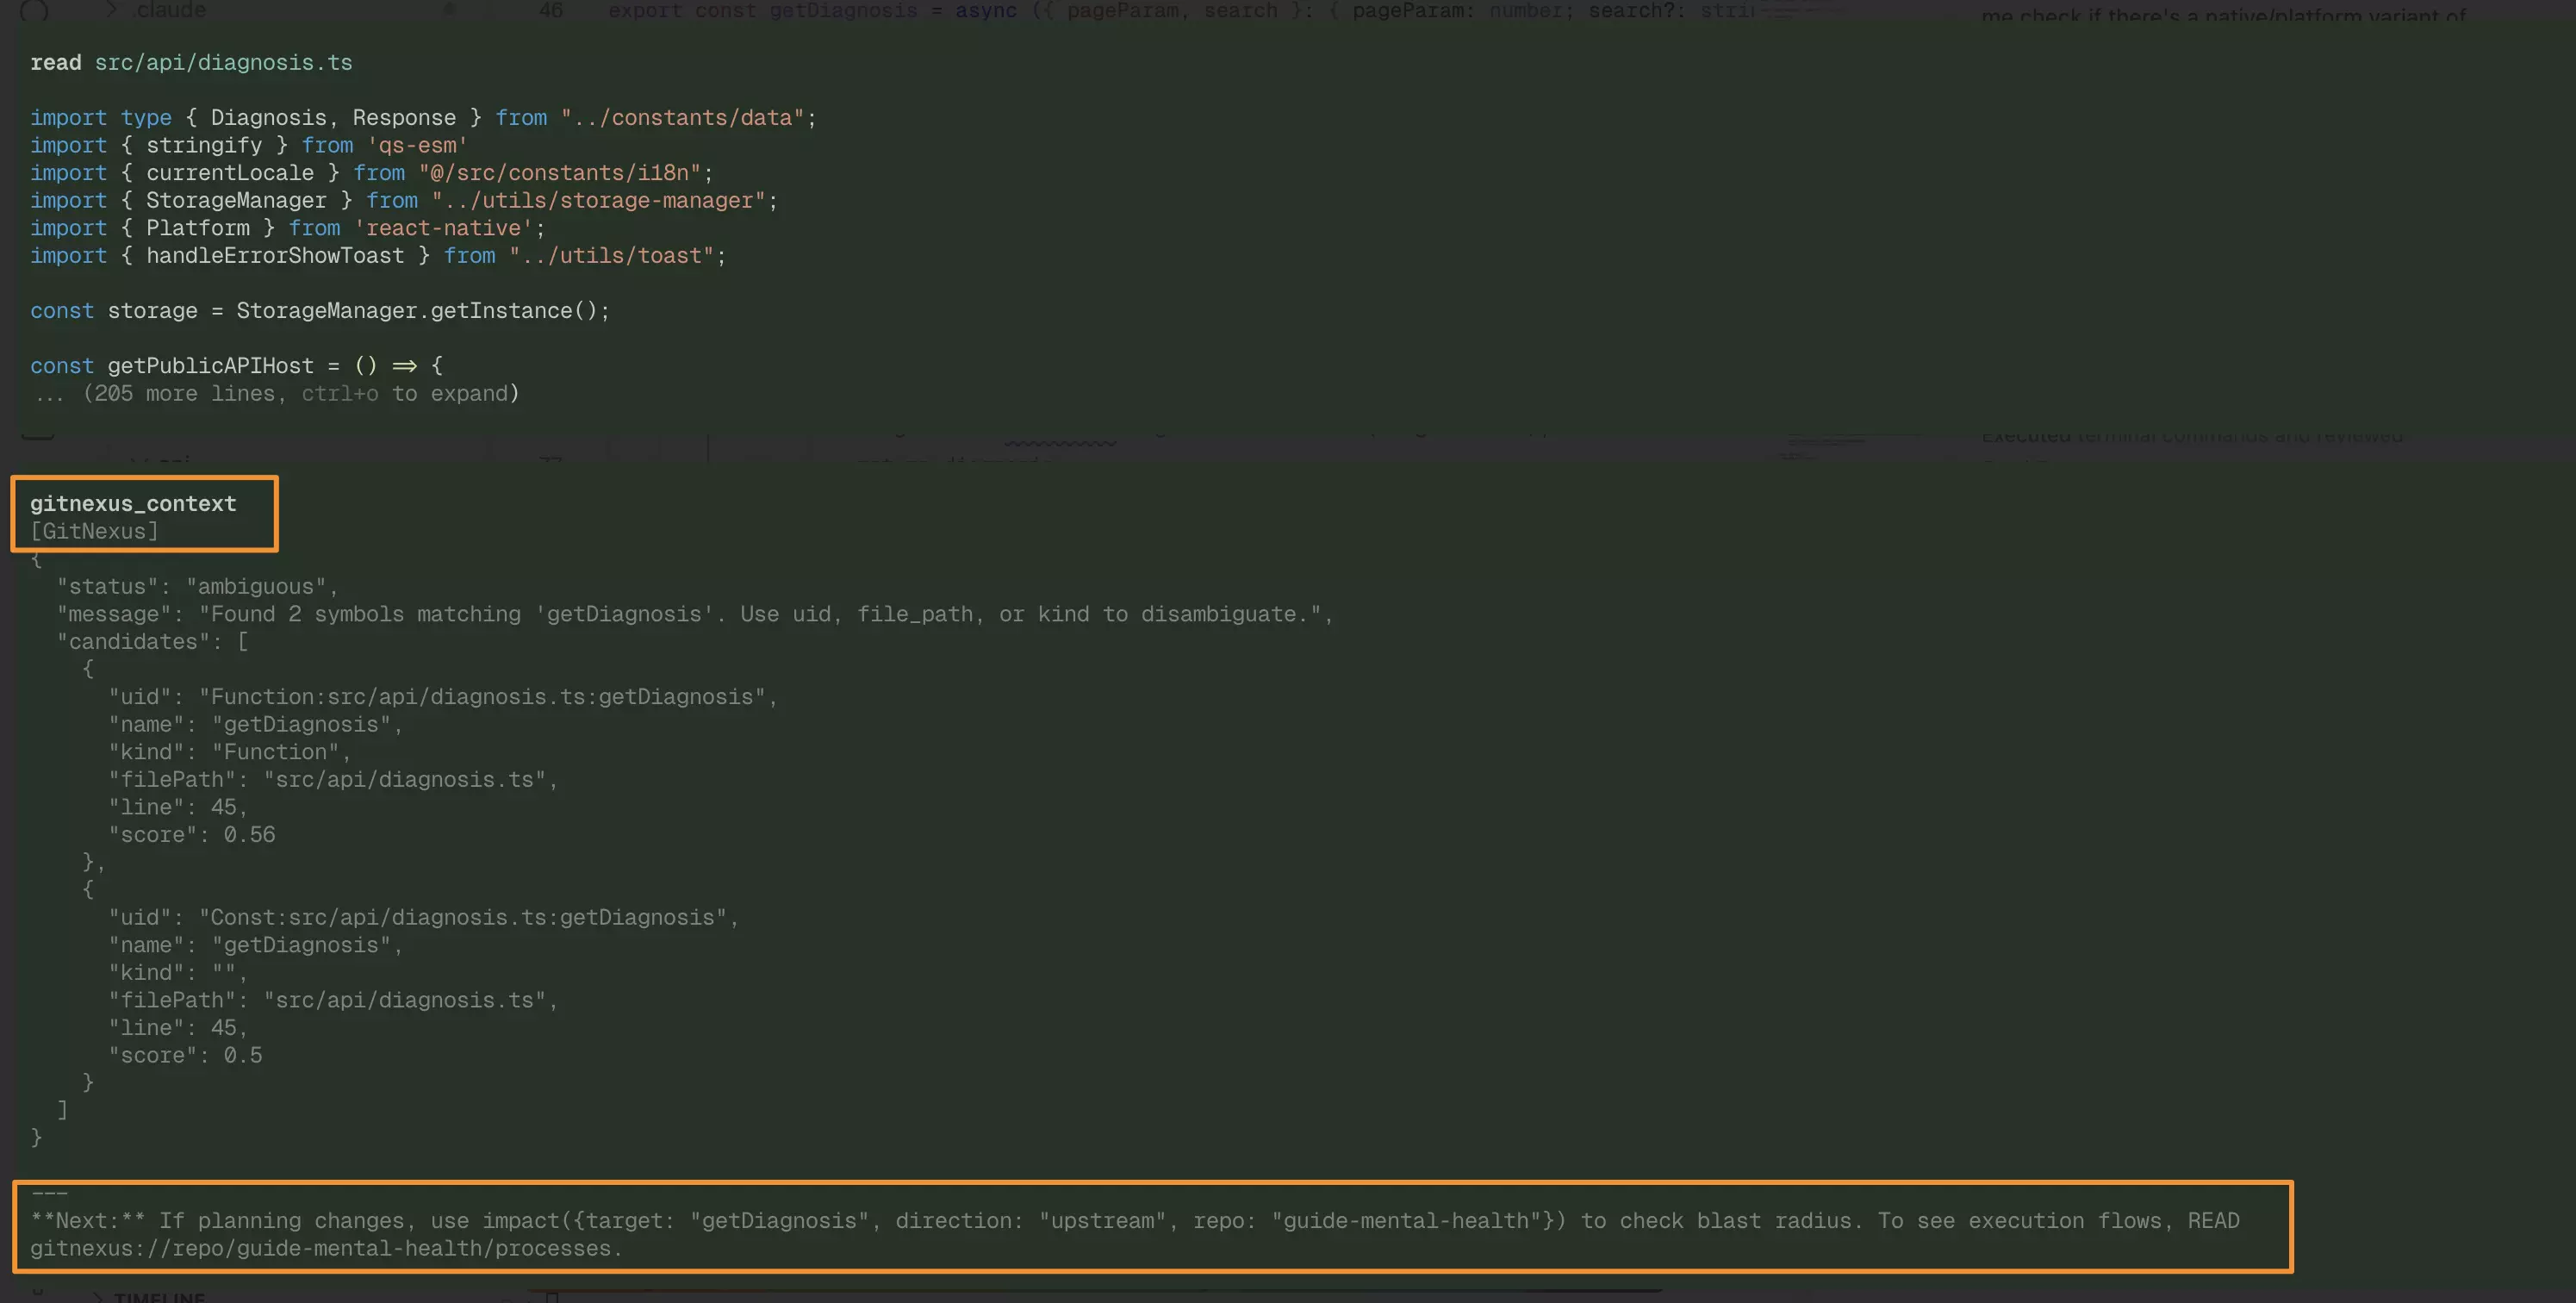
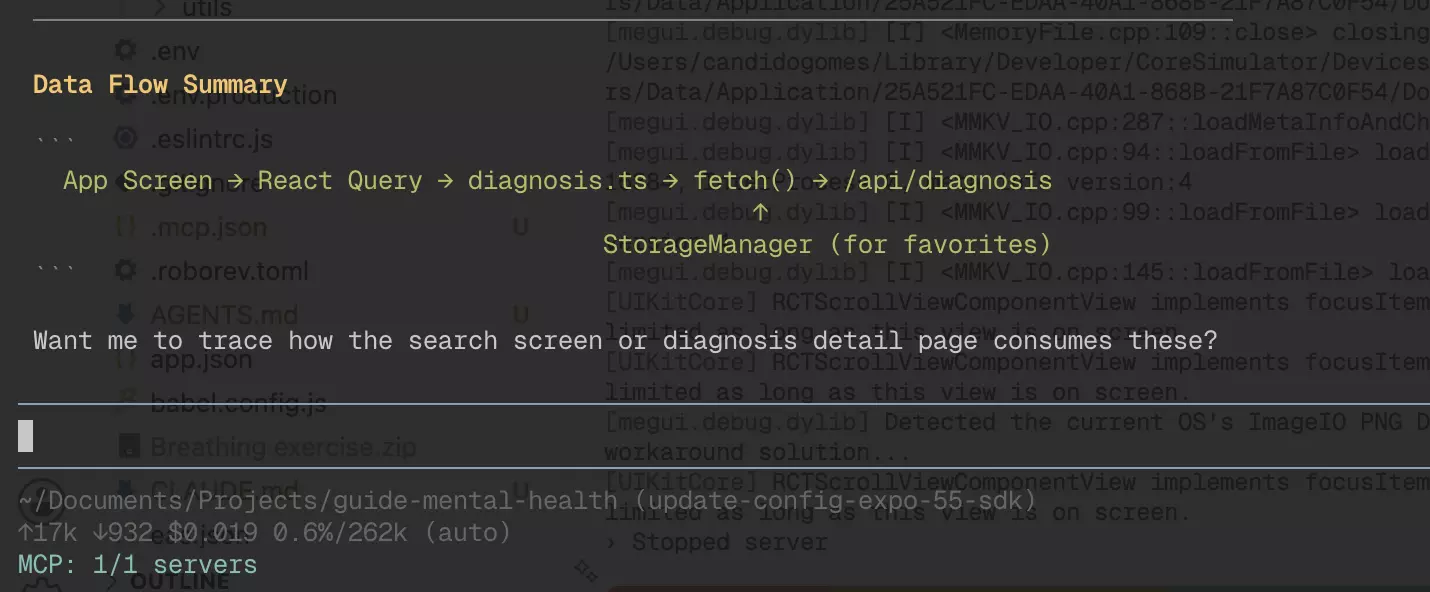
All dependencies found via LadybugDb
Using Claude Code without GitNexus, with the same prompt, it starts searching the code via Bash, which is less effective.
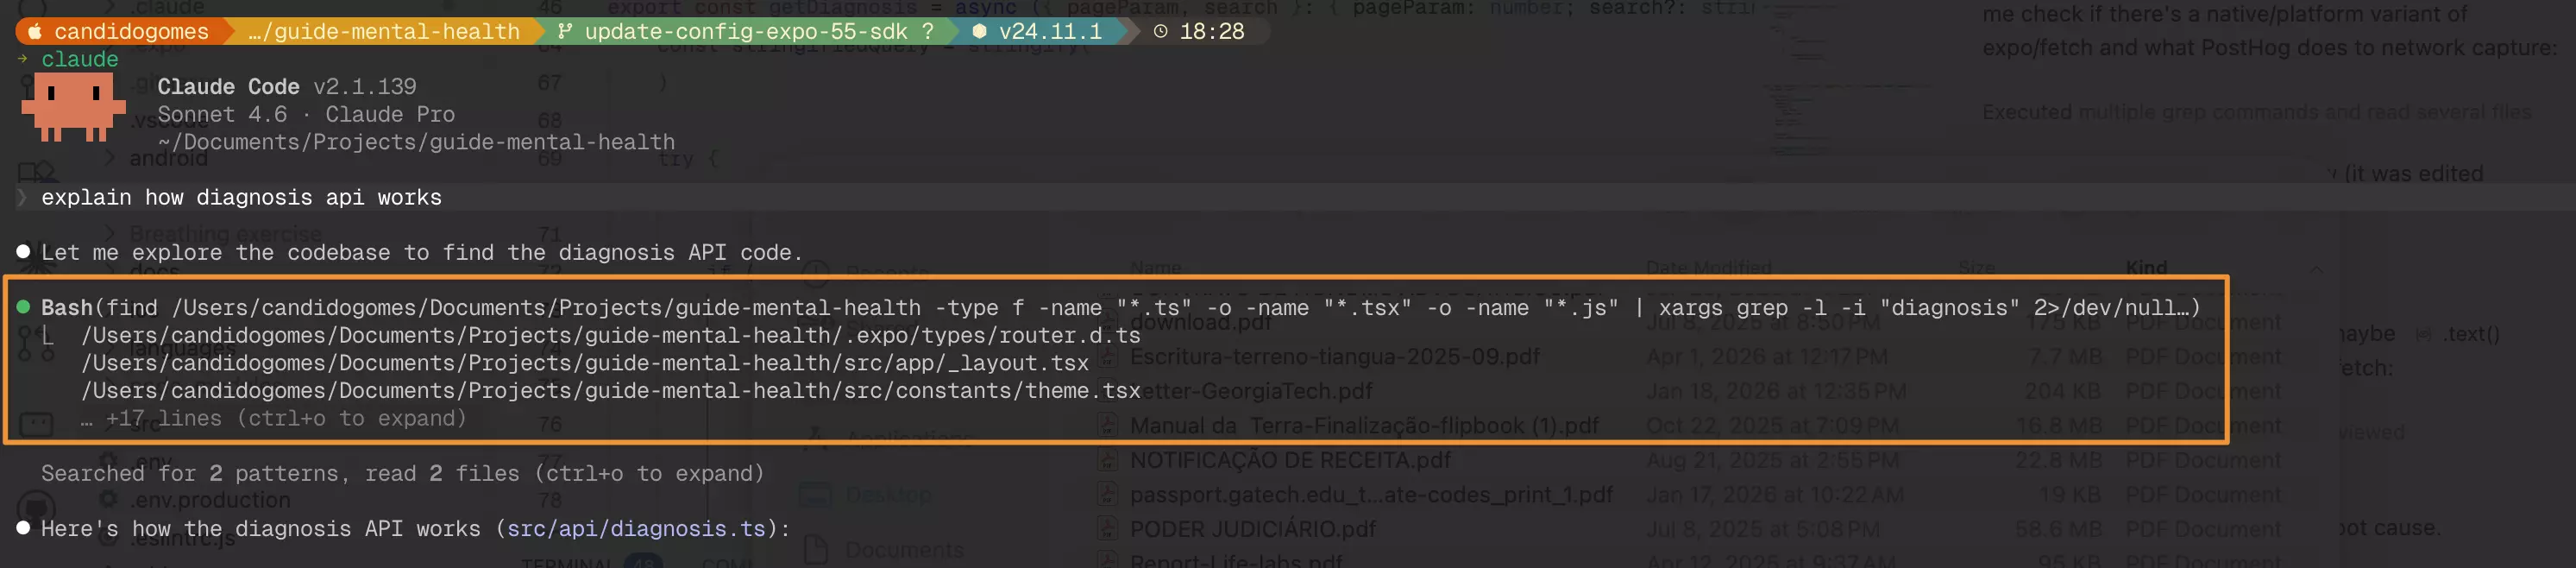
Claude Code searching for dependencies via Bash, without GitNexus
In terms of cost, you can compare the token consumption between the two approaches:
| Pi + Kimi K2.6 + GitNexus | Claude Code without GitNexus |
|---|---|
 |
 |
Pi completed the full analysis at 17k tokens total ($0.019), while Claude Code was already at 25.2k tokens just in context overhead, before doing any real work. That’s ~33% more tokens burned before Claude Code even starts.
Another tool that has the same approach is code-review-graph, but I have not tested it yet.
Kimi K2.6
I believe it’s a very promising open source LLM, not just for simple tasks, but also for complex and long-running ones.
For better integration with Pi, I use Hugging Face, which offers access to Kimi K2 via Inference Provider (Novita).
To do this, you need to create a paid account on Hugging Face and generate an Access Token with the following privileges:
- Make calls to Inference Providers;
- Make calls to your Inference Endpoints;
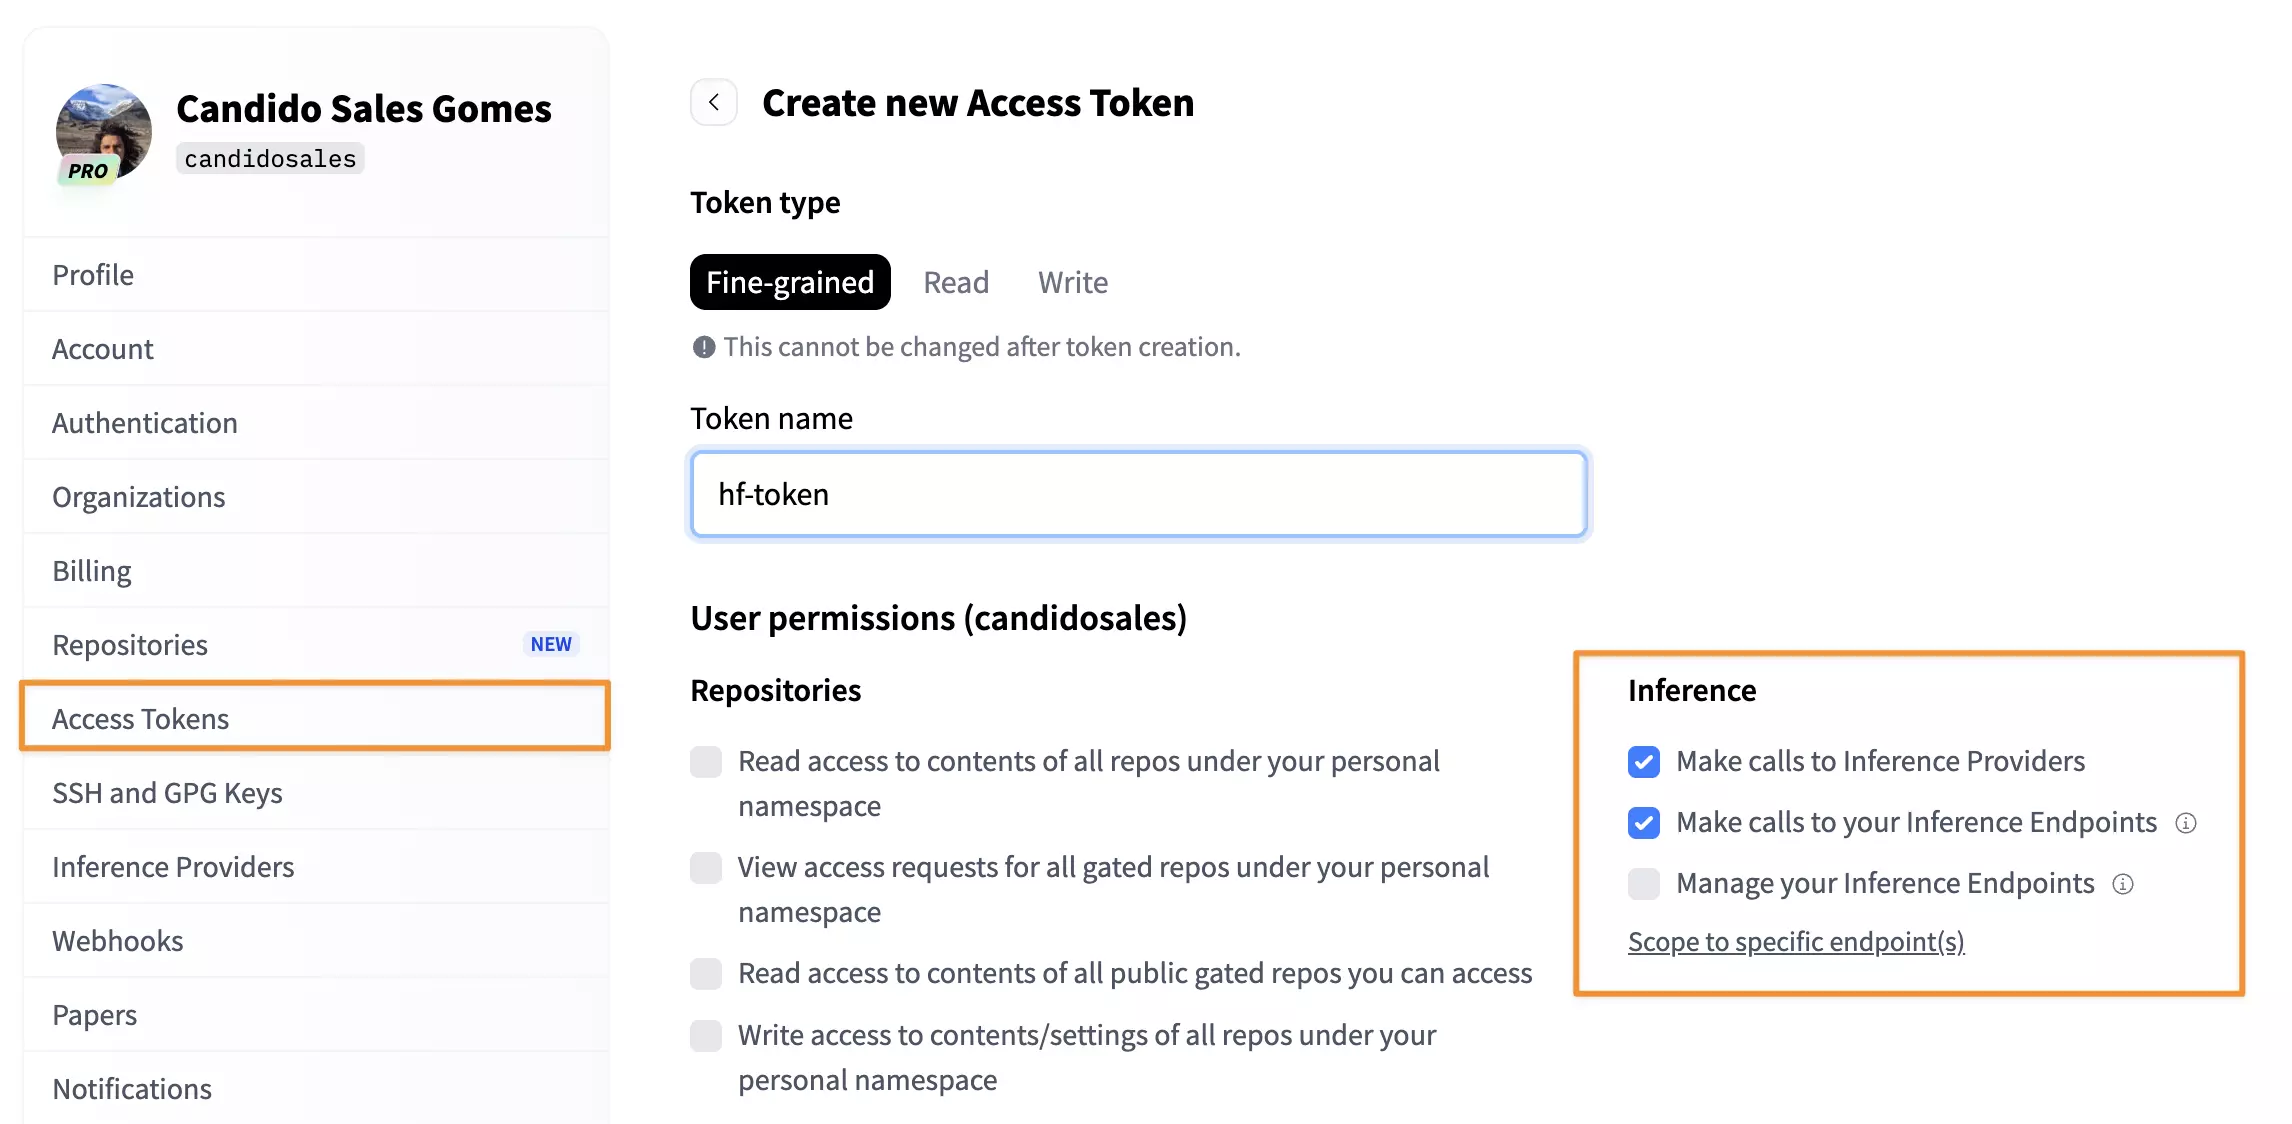
Required privileges for the Access Token on Hugging Face
Then, open pi, run /login, select Use an API key, choose Hugging Face, and add the token. From there, you’ll have access to all available open source LLMs.
The cost for 1M tokens is only $0.95, 7x cheaper than Claude Code.
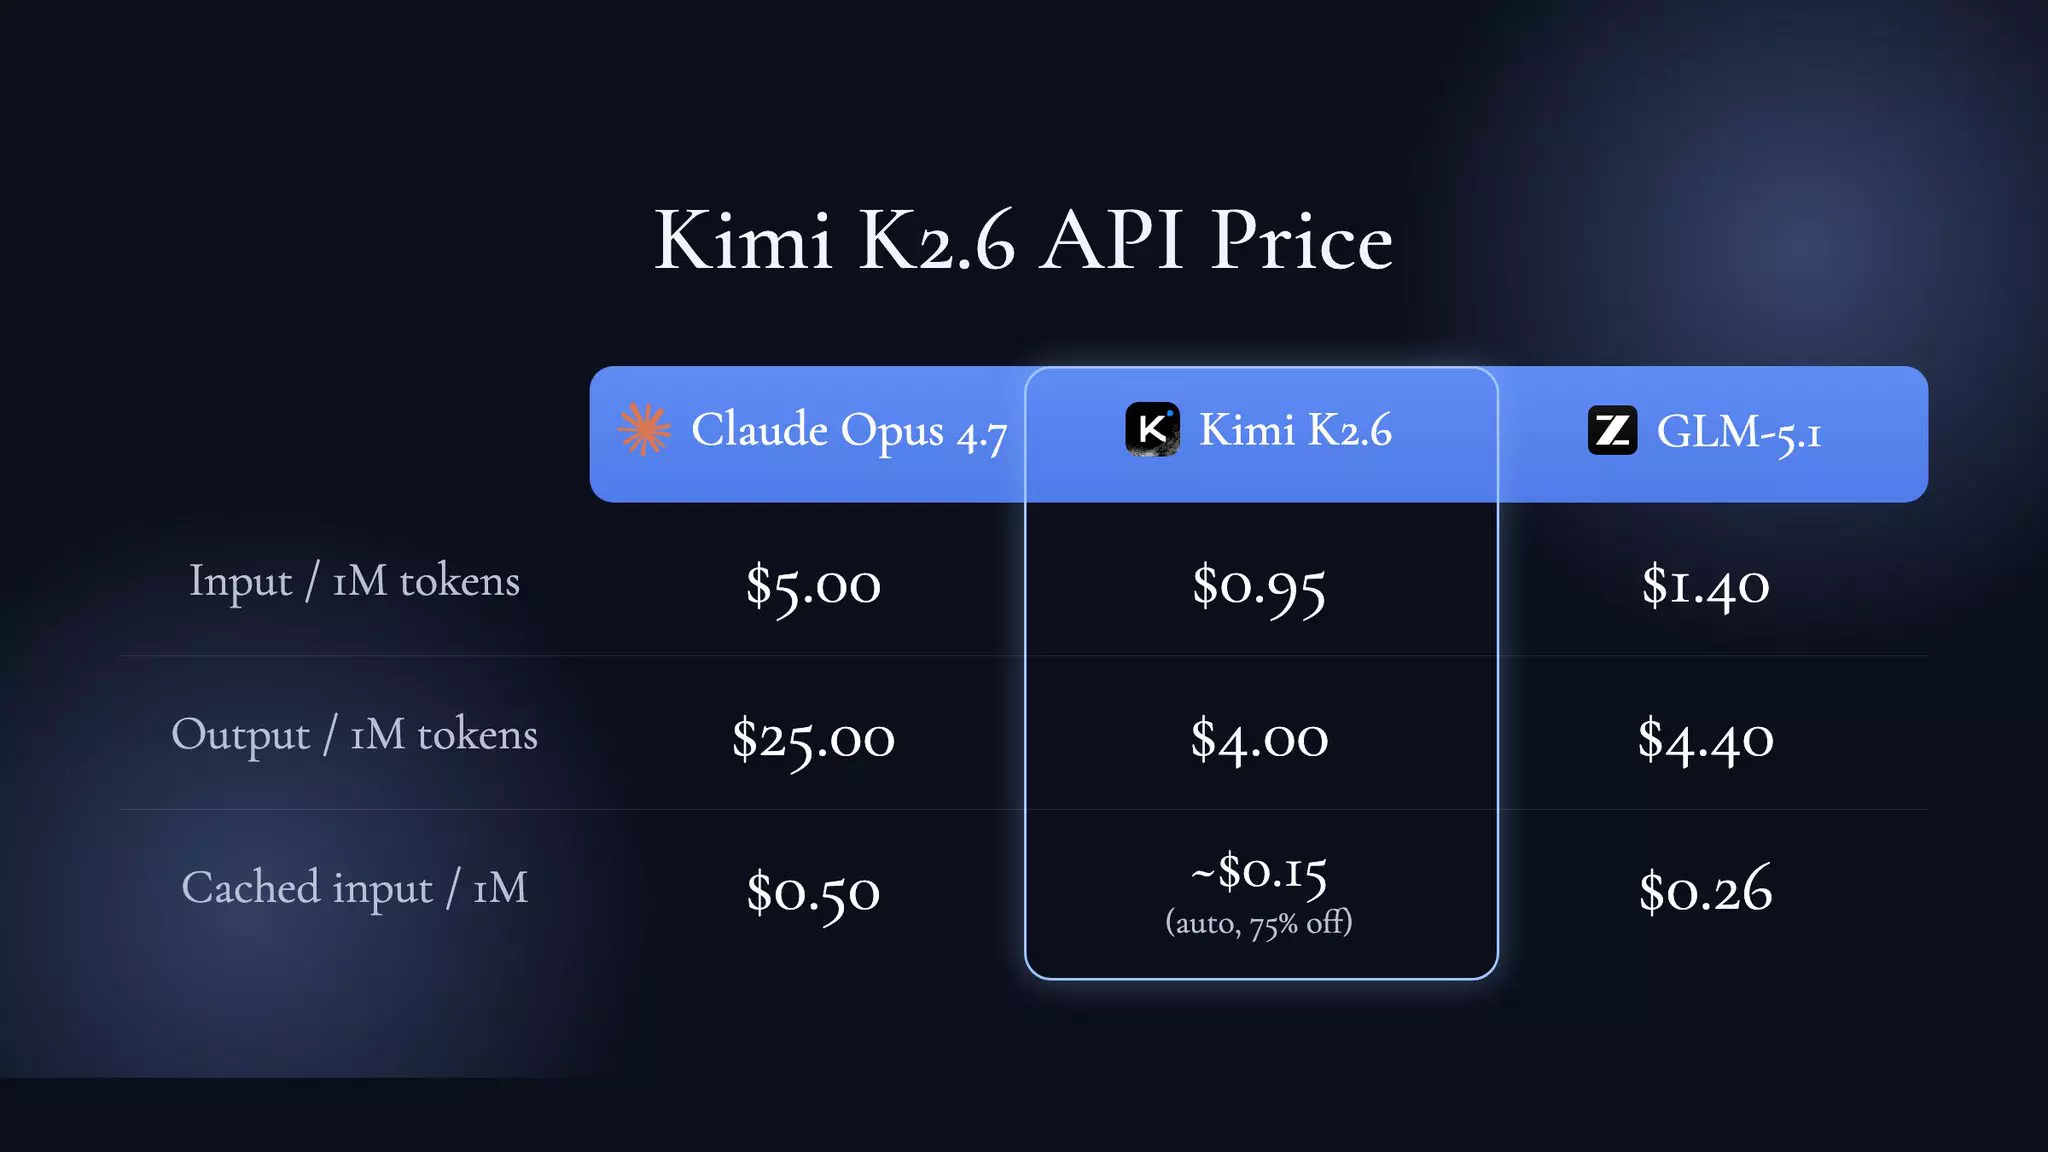
Kimi K2.6 via Hugging Face: $0.95/1M tokens, 7x cheaper than Claude Code
Worth checking out: Cursor, for example, used Kimi 2.5 as the reinforcement learning base for Composer 2.
Compound engineer
There are several tools to make your workflow more agentic, such as superpowers, OpenSpec, spec-kit, and get-shit-done. The one I’ve liked the most so far, and have been using for a few months, is the compound-engineering-plugin.
This plugin is maintained by the Every team, who are constantly improving and optimizing the skills. The philosophy behind the tool is simple: Plan → Work → Review → Compound → Repeat.
For complex or multi-step tasks, such as new features involving multiple repositories, critical migrations, and refactors, I always use the compound-engineer. The flow I follow:
/ce-brainstorm: Starting point when I don’t have full clarity on what to build. Explores requirements and approaches through collaborative dialogue. I usually add the link to the Notion RFC or Linear task at this stage, and for that I have the Notion and Linear MCPs integrated into my environment. At the end, it generates a markdown file that serves as memory for the next step;/ce-plan: Transforms the idea into a blueprint. At the end of a plan, I always ask it to review and refine, as it often finds new caveats I hadn’t noticed. Here it generates a separate file that will guide the execution. If the task involves many files, I ask it to plan in stacked PRs with a maximum of 20 files, which makes review by teammates much easier;/ce-work: Execution follows the plan. The agent implements while the developer monitors;/ce-code-review: Catches problems before they reach production. More importantly, it records learnings for the next cycle. It fires more than 14 specialized agents in parallel: security-sentinel, performance-oracle, data-integrity-guardian, architecture-strategist, pattern-recognition-specialist, code-simplicity-reviewer, and framework-specific reviewers (DHH-rails, Kieran-rails, TypeScript, Python). Everything consolidated into a single prioritized list;/ce-commit-push-pr: Commits, pushes, opens the PR, and generates the title and description. Very useful.
This flow has helped me a lot with large migrations and new architecture implementations, and it has saved me a great deal of time.
Plans are the new code: The plan document is now the most important artifact you produce. Instead of coding first and documenting later, start with the plan. It becomes the source of truth that agents use to generate, test, and validate code. A good plan captures decisions before they become bugs; fixing ideas on paper is much cheaper than fixing code afterward.
At the end of the work, I save the files generated by the plugin in a separate folder per project, making it easy to link them when needed.
Conclusion
I notice that every month, my workflow gets leaner, with better accuracy and lower cost. The combination of Pi + open source LLM has brought me a significant cost reduction without any loss of quality. The quality of the output is directly related to how much context and access you provide to the LLM, and this, during the planning phase with the compound engineer, is being resolved very efficiently.
My next steps are to create a fully automated flow: in the morning, the agent checks my tasks, selects one, plans it, implements it, opens the PR, and notifies me, so when I wake up I just need to review. I want this infrastructure to run locally inside a container. For this experiment, I plan to use Flue, a framework created by the Astro team for building autonomous agents with TypeScript. When I have a meaningful result, I’ll share here how it was implemented.
I hope this article provides some direction amid the sea of news that the AI ecosystem floods us with every day, and that it makes your life as a developer a little bit better. And I’ll say it again: don’t outsource the understanding of your own code.
Note
If you’re just getting started and want an introductory course on the full AI-assisted development cycle, I recommend this workshop by Matt Pocock:
References
- Full Walkthrough: Workflow for AI Coding — Matt Pocock
- Pi Agent – Crash Course | Minimal Coding Agent
- Building pi in a World of Slop — Mario Zechner
- Kimi K2.6
- Kimi K2.6: Advancing Open-Source Coding
- Compound Engineering - The AI-native engineering philosophy
- Cursor admits its new coding model was built on top of Moonshot AI’s Kimi
- Claude Code is Expensive. This MCP Server Fixes It (Context Mode)
- I cut my Claude Code bill by 70% with 3 GitHub repos